
Introduction
I’m always on the lookout for ways to get more out of my homelab without dedicating an entire room, or electricity bill to it. For a long time that meant repurposed enterprise gear and ageing NUCs
So when mini PCs started genuinely closing the gap on performance, I started paying attention.
The GMKtec NucBox K8 Plus landed on my radar after I kept seeing it pop up in homelab communities. On paper it looked almost too good — an AMD Ryzen 7 8845HS, dual Intel 2.5GbE NICs, support for up to 96GB of DDR5 RAM, and a form factor roughly the size of a paperback book. The kind of specs that, not long ago, would have cost you serious money and a rack shelf to go with it.
The Intel NICs in particular caught my eye. Anyone who’s tried to run ESXi on a budget mini PC will know the Realtek NIC problem all too well, and avoiding that headache straight out of the box felt like a meaningful design decision rather than a happy accident.
In this post I’m going to walk through the hardware in detail and cover getting ESXi up and running on it. I’ll be saving the deeper dive into running Omnissa Horizon on this machine for a follow-up post.
Unboxing and First Impressions
I purchased the GMKtec directly from their AliExpress store. I decided to purchase the bare bones version so that I could install my own hard drive and RAM. It took approximately a week to arrive to my doorstep. Pretty impressive.
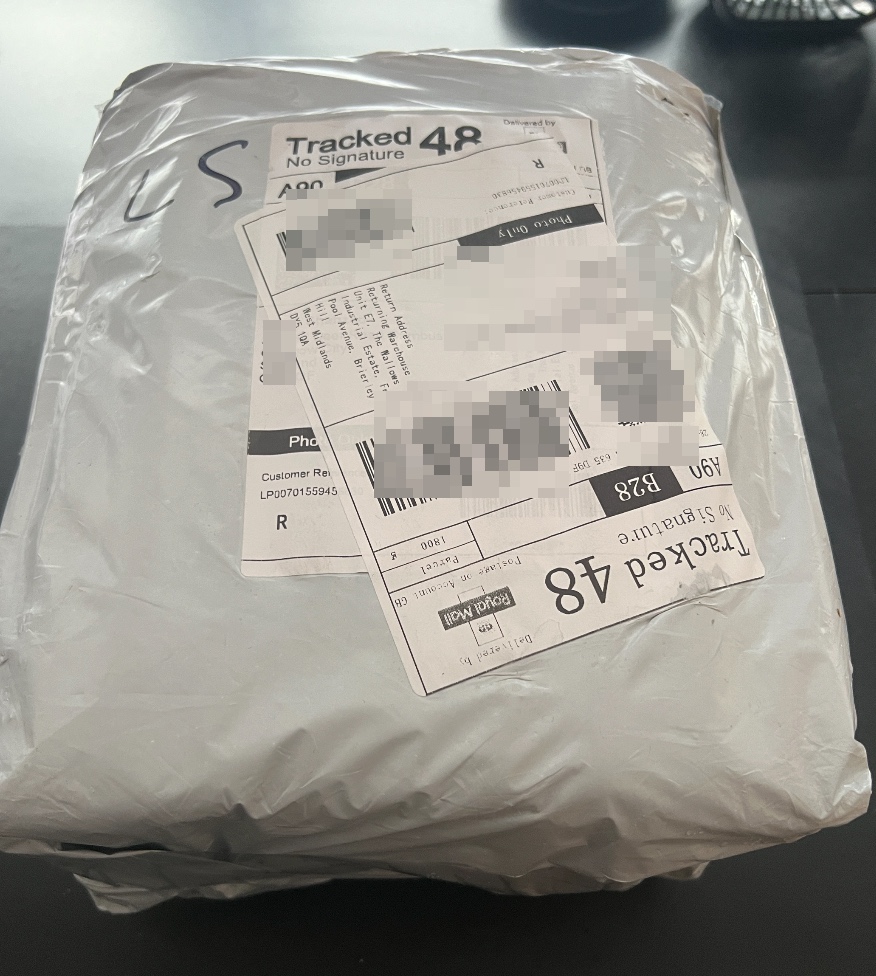
Budget mini PCs from Chinese manufacturers don’t exactly have a reputation for the Apple-style unboxing experience, so I was pleasantly surprised when the K8 Plus arrived in a genuinely well-presented box.
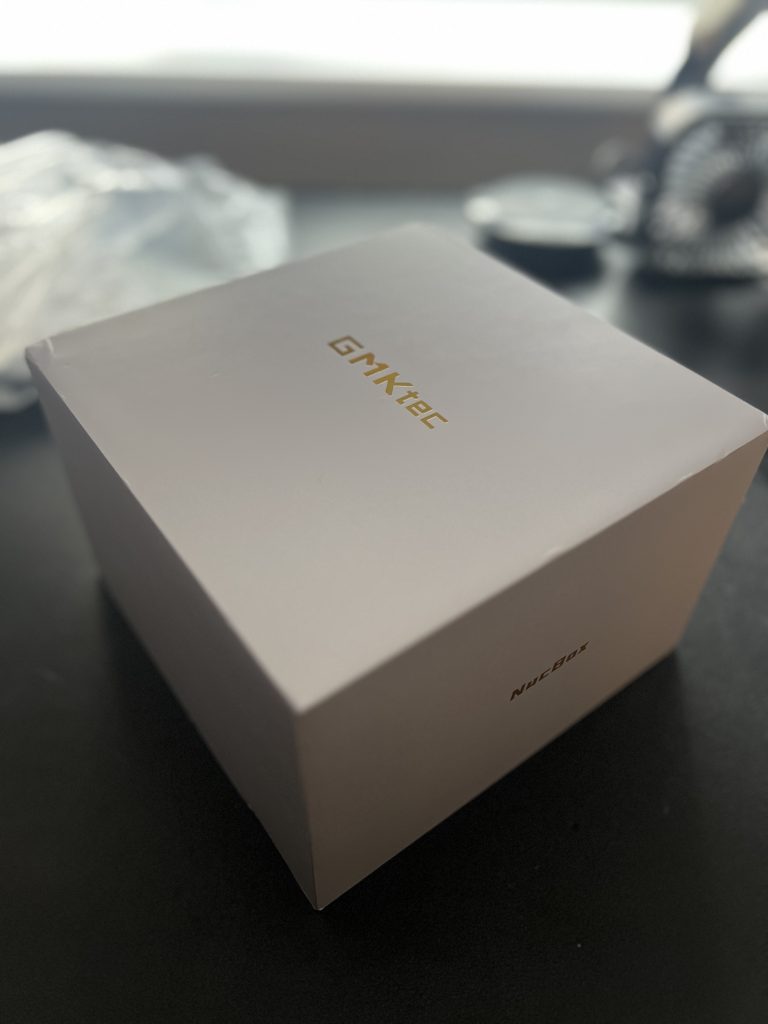
It’s clean, structured, and clearly thought about. Everything is snugly seated , nothing rattles around, and there’s a sense that someone actually cared about the first impression.
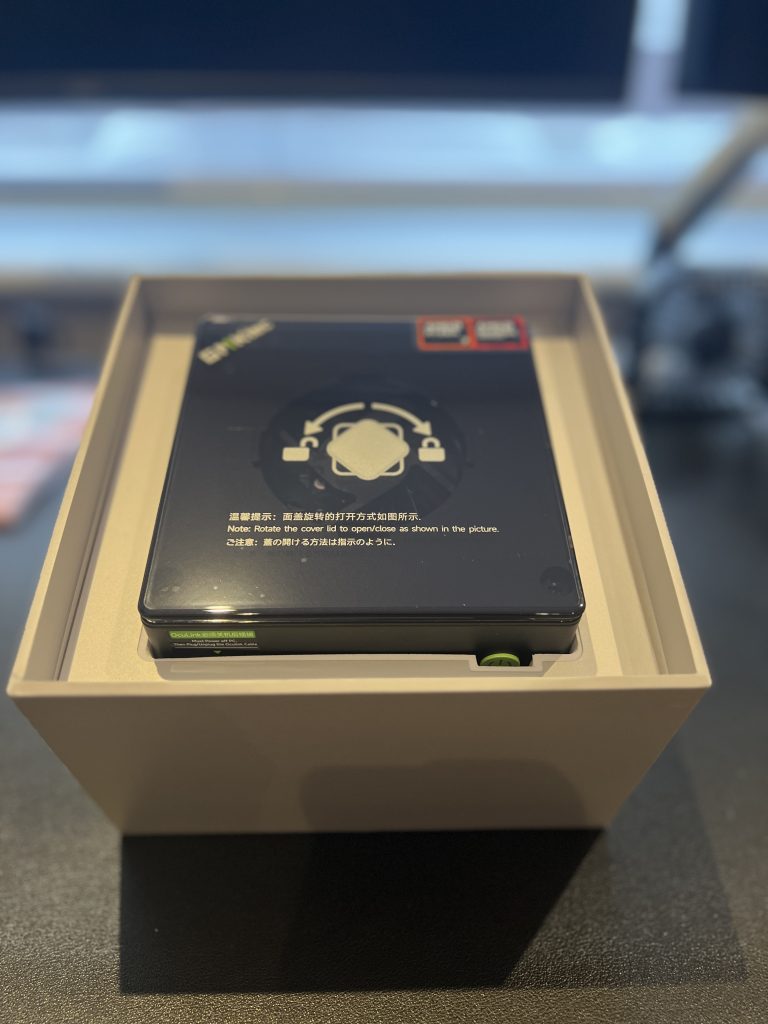
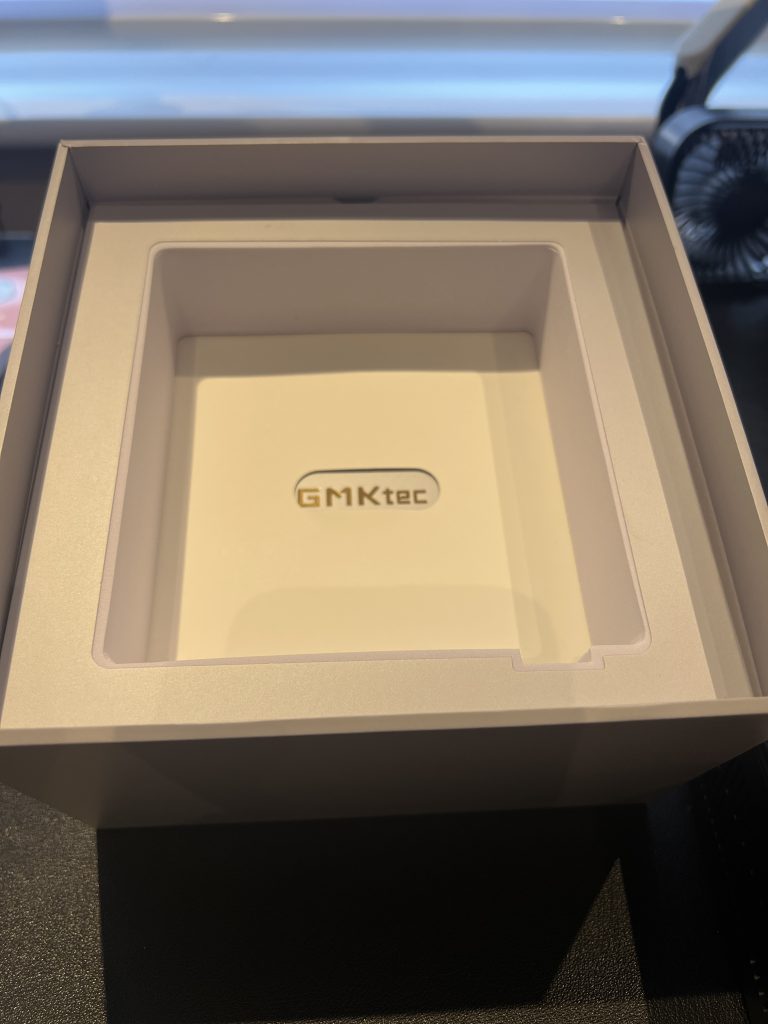
Inside the box you get everything you need to hit the ground running: the unit itself, an HDMI cable, the power adapter, and a VESA mounting bracket. No fluff, no mystery cables, just the essentials, neatly presented.
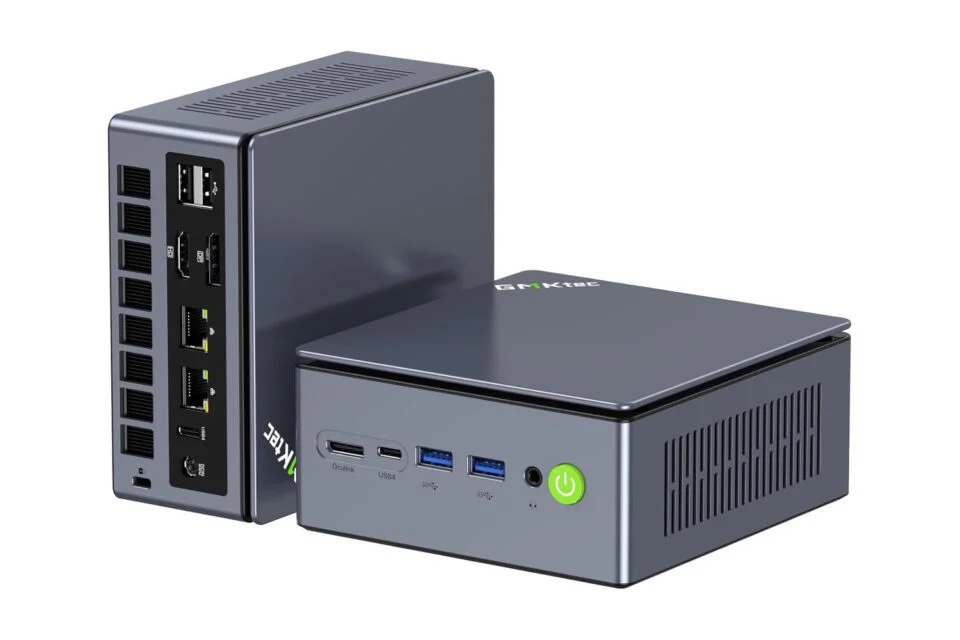
The unit itself is compact and understated. It’s heavier than you expect when you pick it up for the first time, which in my experience is always a good sign. The chassis is well-ventilated on the sides and top, and the transparent panel on the top cover is either a neat aesthetic touch or a mild eyebrow-raiser depending on your taste, I’ll let you decide from the pictures.
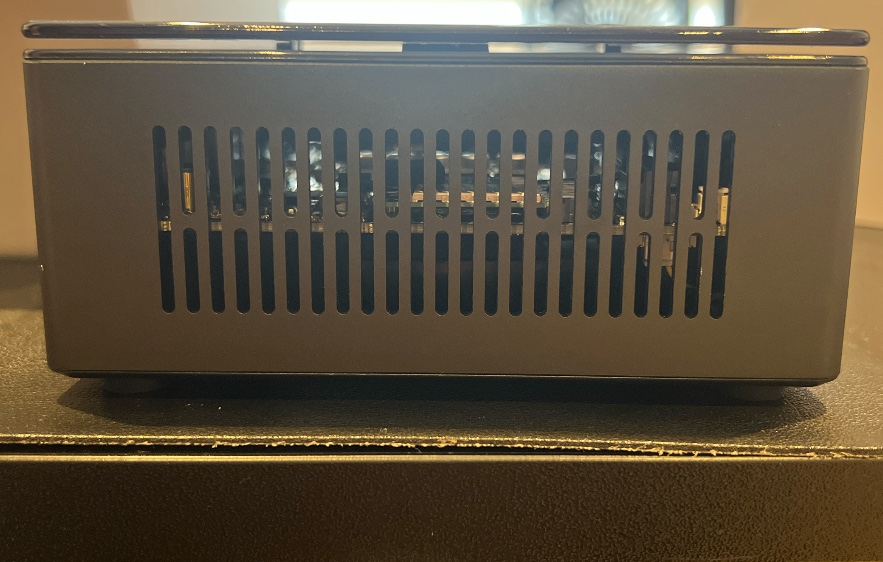
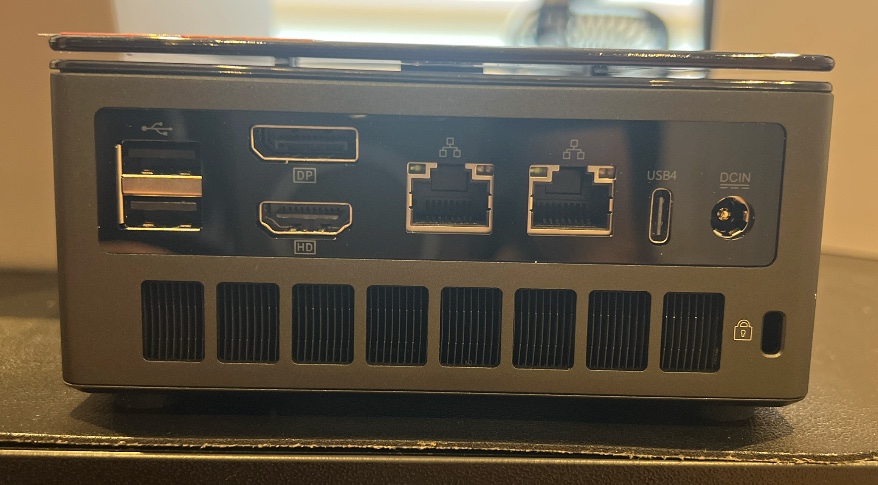
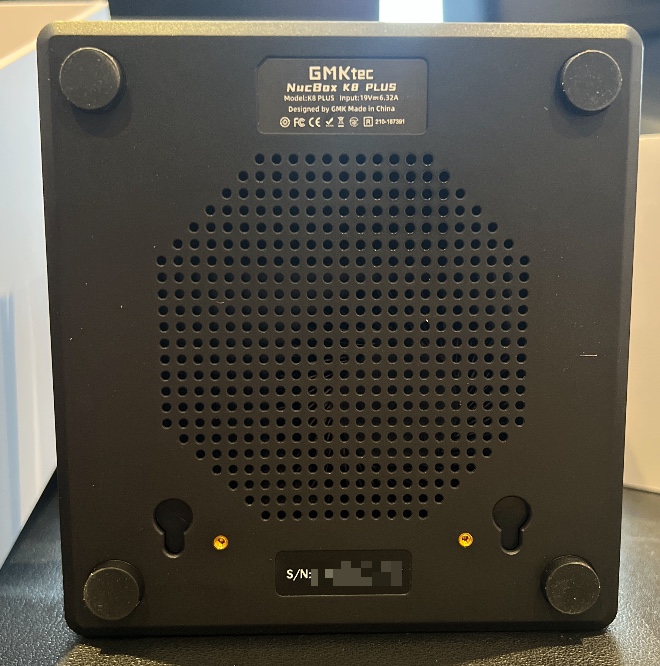
What struck me most was just how small it is in person. You’ve seen the dimensions on paper — 125 x 132 x 61mm — but until it’s sitting on your desk next to a coffee mug, it doesn’t quite register that something this capable can come in a package this size.
First impressions then: solid, premium-feeling for the price, and packaged with more care than I expected. A good start.
Hardware Specs Breakdown
Let’s have a look at what’s inside the machine, as the spec sheet is genuinely impressive for the size and price, and a few of the details matter quite a lot in a homelab context.
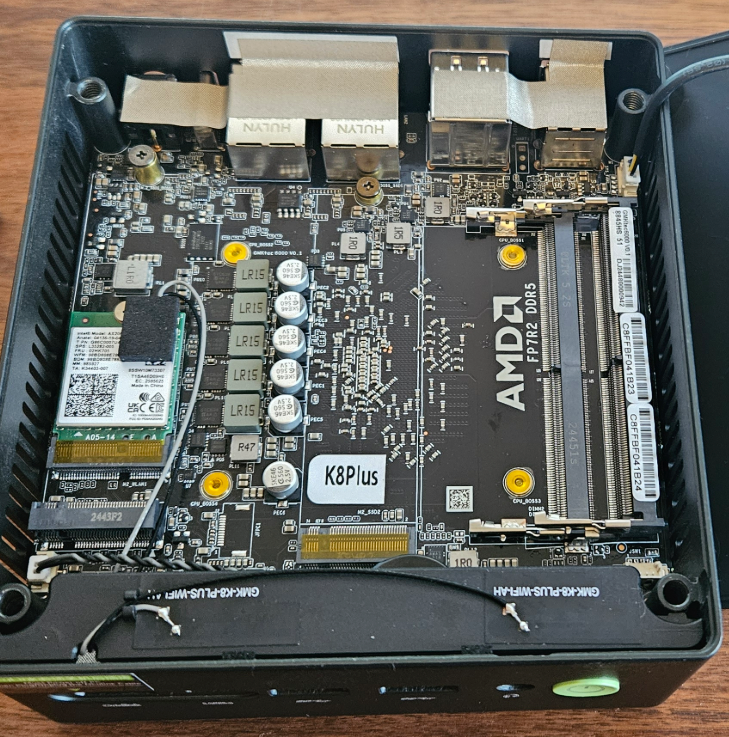
CPU — AMD Ryzen 7 8845HS
The K8 Plus is powered by the AMD Ryzen 7 8845HS — 8 cores, 16 threads, built on AMD’s Zen 4 architecture, with a boost clock of up to 5.1 GHz on a 4nm process node. For a mini PC this is a serious chip, and it handles everything you’d throw at a homelab host without breaking a sweat.
For those of us running ESXi, the Zen 4 architecture is worth calling out specifically. Unlike Intel’s hybrid CPU designs which mix performance and efficiency cores, every core on this processor is uniform. That might sound like a minor detail but if you’ve ever spent an evening troubleshooting vSphere instability caused by E-core weirdness on an Intel consumer chip, you’ll appreciate why this matters. With the 8845HS, that’s one less thing to worry about.
GPU — AMD Radeon 780M
The integrated graphics are handled by the AMD Radeon 780M, based on the RDNA 3 architecture. For a homelab host running ESXi this is largely irrelevant day-to-day — but it’s worth noting for completeness, and I’ll touch on iGPU passthrough limitations when we get to the ESXi section. Spoiler: don’t get your hopes up on that front.
Memory — DDR5, Up to 96GB
The headline figure here is the maximum supported capacity — 96GB. For a machine this size, that’s a significant amount of headroom for spinning up multiple VMs, and it’s one of the reasons the K8 Plus stands out against similarly priced alternatives.
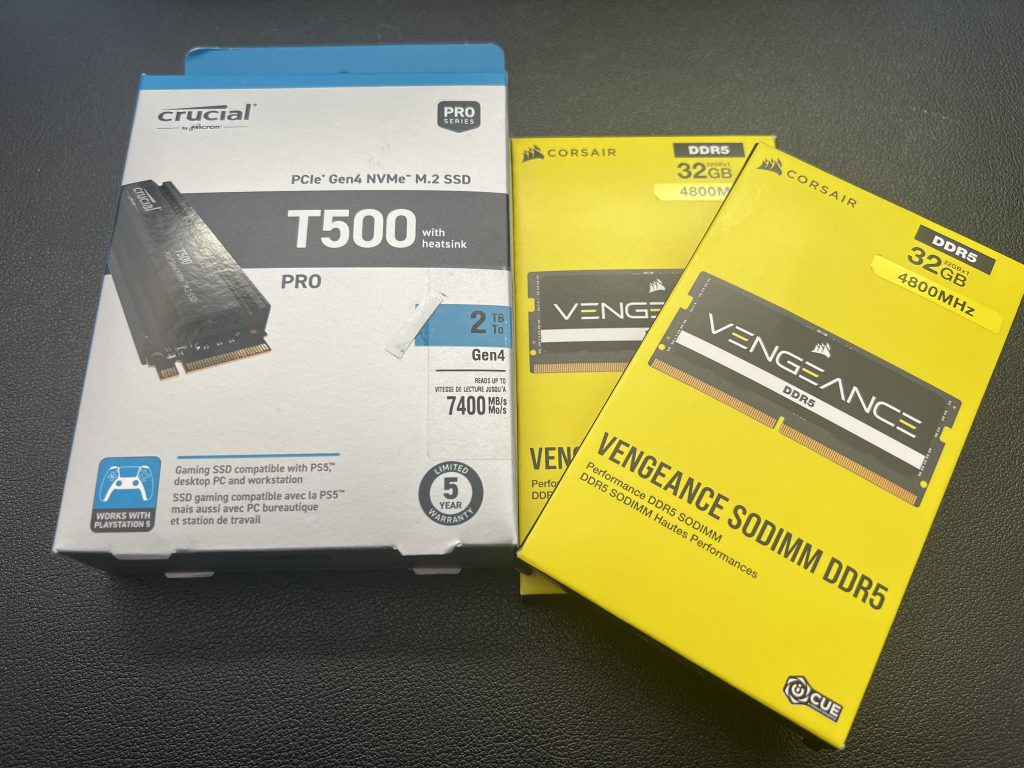
I went with 2 x Corsair Vengeance 32GB DDR5 modules.
Storage — Triple M.2 and a Homelab Trick
The K8 Plus has two full PCIe 4.0 M.2 2280 NVMe slots for your datastores, supporting up to 8TB of total storage between them. That’s already a solid foundation for a homelab setup.
But here’s the detail that the homelab community has latched onto, and rightly so — there’s a third M.2 slot onboard, normally occupied by the WiFi card. Since you don’t need WiFi on an ESXi host, that slot is effectively free real estate. Pop a small, cheap NVMe drive in there — a 128GB or 256GB 2230 form factor drive works perfectly — and you’ve got a dedicated ESXi boot drive that keeps your two main NVMe slots entirely free for VM storage. It’s a neat trick and one I’d strongly recommend taking advantage of.
To start with, I decided to use 1 x 2TB Crucial T500 Pro NVMe for storage.
Networking — The Detail That Seals the Deal
This is the one that matters most for ESXi, so I’ll give it the attention it deserves.
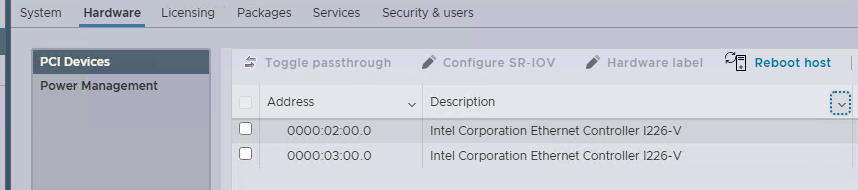
The K8 Plus ships with dual 2.5GbE ports driven by Intel i226V controllers. If that doesn’t immediately mean anything to you, here’s the context: a huge number of mini PCs at this price point ship with Realtek NICs, which are not supported in ESXi. It’s one of the most common pain points people run into when trying to build an affordable homelab host, often requiring custom ISOs or USB NIC workarounds to get ESXi to even see the network.
The K8 Plus sidesteps that problem entirely. The Intel i226V is recognised natively by ESXi, no fuss, no workarounds. It might seem like a small thing, but when you’re building a lab to learn and test rather than spend your evening fighting drivers, it’s genuinely one of the most important specs on the sheet.
Two ports also gives you some useful flexibility — dedicated management and VM traffic on separate interfaces if you want to keep things tidy.
Connectivity
The port selection is generous for a machine of this size. On the front you get two USB 4.0 Type-C ports running at 40Gbps with DisplayPort Alt Mode, two USB 3.2 Gen 2 Type-A ports, a 3.5mm audio jack, and notably — an OCuLink port. On the rear you’ll find two USB 2.0 Type-A ports, HDMI 2.1, DisplayPort 2.1, the dual 2.5GbE LAN ports, another USB 4.0 Type-C, and a Kensington lock slot.
The OCuLink port is worth a mention even if it’s not directly relevant to a standard ESXi setup. It provides a direct PCIe 4.0 x4 connection for an external GPU, which opens up some interesting possibilities for workloads that could benefit from GPU acceleration down the line.
Cooling — Hyper Ice Chamber 2.0
GMKtec uses what they call their Hyper Ice Chamber 2.0 cooling system — a dual fan setup with a copper heatpipe base. In practice it handles the chip’s full 70W TDP without thermal throttling, and at idle it’s practically silent. Under sustained load the fans do spin up but noise levels remain reasonable. This is not a machine that’s going to irritate you if it’s sitting on your desk.
For a homelab host that may be running 24/7, that combination of thermal headroom and quiet operation is exactly what you want.
Quick Reference
| Spec | Detail |
| CPU | AMD Ryzen 7 8845HS, 8C/16T, up to 5.1GHz |
| GPU | AMD Radeon 780M |
| RAM | 2 slots, Max 96GB |
| Storage | 2x PCIe 4.0 M.2 2280 + 1x M.2 WiFi slot (ESXi boot drive) |
| Networking | Dual 2.5GbE Intel i226V |
| USB | 2x USB 4.0 (40Gbps), 2x USB 3.2, 2x USB 2.0 |
| Display Out | HDMI 2.1, DisplayPort 2.1 |
| Expansion | OCuLink PCIe 4.0 x4 |
| Cooling | Hyper Ice Chamber 2.0, dual fan, copper heatpipe |
| Dimensions | 125 x 132 x 61mm |
ESXi Installation
If you’ve installed ESXi before, this section will feel refreshingly uneventful — and I mean that as a compliment.
Boot Media — Yes, I Used a USB Drive
I’ll get this out of the way early. I booted ESXi from a USB drive. I know, I know — Broadcom/VMware have been steering people away from USB boot drives for a while now, and yes, there are legitimate reasons for that in a production environment. Flash media has a finite write endurance, and ESXi does write logs and state data to the boot device over time.
But this is a homelab. It’s not running anyone’s business-critical workloads, and if the USB drive dies in two years I’ll just reinstall and move on. The WiFi M.2 slot trick I mentioned in the hardware section is absolutely the cleaner long-term solution, and I may well switch to that down the line — but for getting up and running quickly, a USB drive did the job fine. If best practice is important to you in your setup, that M.2 option is worth doing properly from the start.
What You’ll Need
Nothing exotic. Just:
- A USB drive of at least 8GB (I wouldn’t use anything flash you’re particularly attached to)
- The ESXi installer ISO, downloaded from Broadcom’s portal
- Rufus or similar to write the ISO to the USB drive
The Install Process
This is where the K8 Plus earns its homelab credentials. There is remarkably little to it.
The only BIOS change needed before booting the installer is setting the USB drive as the primary boot device. That’s it. No disabling secure boot gymnastics, no fiddling with AMD CBS settings, no head-scratching over obscure compatibility options. Get into the BIOS, move the USB to the top of the boot order, save and exit.
From there the ESXi installer loads cleanly, and — crucially — both Intel i226V NICs are detected automatically, no custom ISO required. If you’ve ever had to build a custom ESXi image just to get network adapters recognised, you’ll know exactly how much time and frustration that saves. The K8 Plus just works.
I initially installed ESXi 8.0 Update 3c, walked through the standard installer prompts, pointed the boot partition at the USB drive, set a root password, and was looking at the DCUI welcome screen in under ten minutes.
Upgrading to Update 3g
Since the initial install I’ve upgraded to ESXi 8.0 Update 3g and the process was completely painless. No compatibility issues, no post-upgrade surprises, everything came back up cleanly. If you’re starting fresh today I’d just go straight to 3g — there’s no reason not to.
First Boot Impressions
Once ESXi is up and running the host presents exactly as you’d expect — both NICs visible, all the NVMe storage detected, and the full amount of RAM (or however much you’ve fitted) correctly reported. Open the web client, log in, and you’re in business.
Genuinely, the most time consuming part of the whole process was waiting for the installer USB to write. The actual installation experience on this hardware was as smooth as I’ve had on any machine, consumer or otherwise.
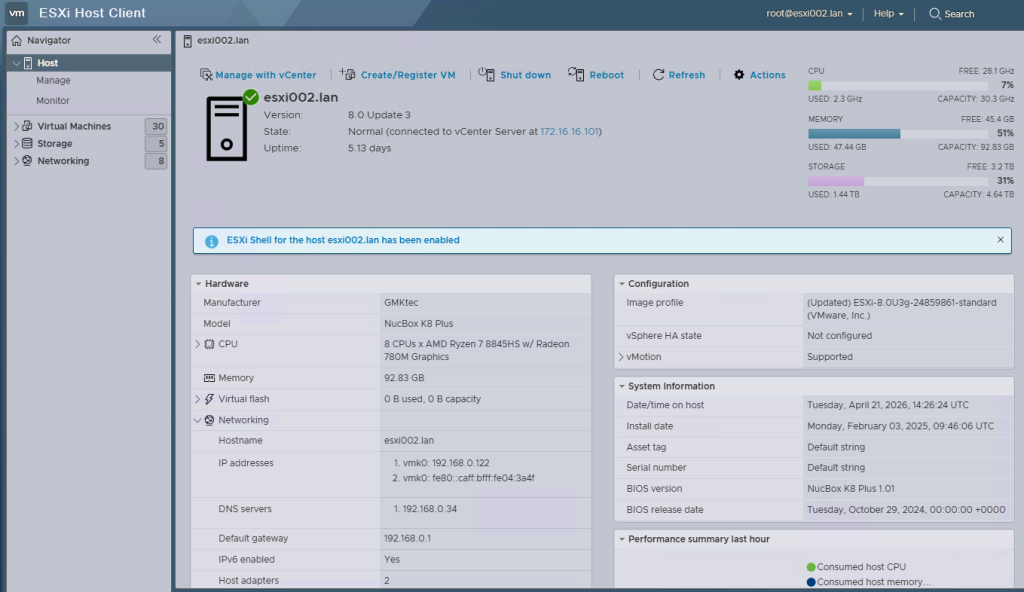
Here is the web client of my ESXi install. I’ve also upgraded my RAM to 96GB in the meantime!
Performance as an ESXi Host
Specs on paper are one thing. How a machine actually behaves when you’re pushing VMs at it is another. So after getting ESXi installed and the host configured, the real test began — and I’m happy to report the K8 Plus has not disappointed.
What I am Running
My Horizon homelab consists of:
- Opensense Router
- 1 x vCenter Server Appliance
- 2 x Horizon Connection Servers (Server 2025)
- 2 x Horizon App Volumes Managers (Server 2025)
- 2 x Horizon UAG’s
- 1 x Domain Controller (Server 2025)
- 4 x Instant Clone VDI’s (W11 24H2)
- 1 x Jump Server (Server 2019)
The above allows me to use a properly representative Horizon environment. Everything is there to learn the platform end to end, validate configurations, and break things safely without anyone’s working day depending on it.
General Host Performance
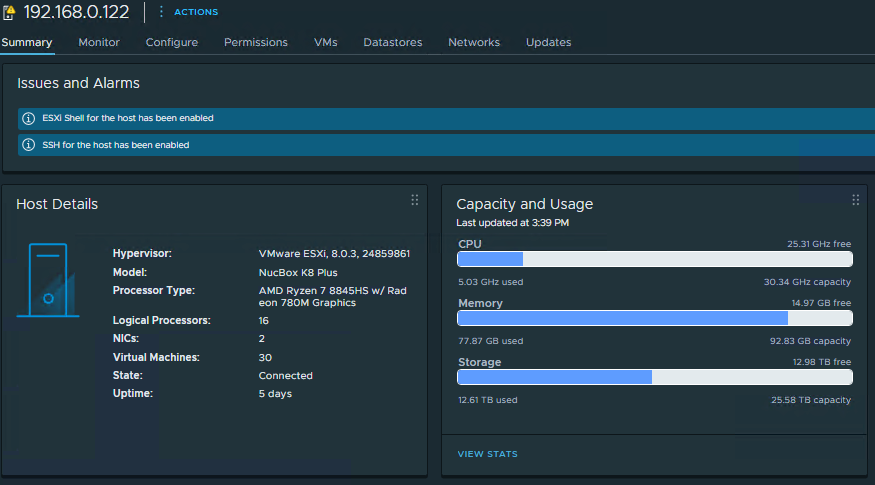
Day-to-day the host is responsive and stable. The Ryzen 7 8845HS has proven to be a solid foundation for a homelab workload — it’s not breaking a sweat running a typical mix of infrastructure VMs, and the Zen 4 architecture means ESXi schedules workloads cleanly across all cores without any of the complications you can run into with Intel’s hybrid designs.
CPU utilisation at idle with my standard lab stack running sits around 15%, which leaves plenty of headroom for spinning up additional workloads when needed. The CPU is not the bottleneck in my homelab.
RAM is where this machine really flexes for a homelab host. With 96GB fitted, I have comfortable headroom across all my running VMs with room to spare. The DDR5 at 4800MHz in dual channel keeps things moving, and ESXi memory management has been behaving exactly as expected. If you’re planning to run a more demanding lab environment, you can take advantage of ESXi Memory Tiering using another suitable NVMe drive to really expand your RAM resources.
Storage performance across the NVMe datastores has been excellent. PCIe 4.0 means VM storage I/O is not a bottleneck in any scenario I’ve thrown at it, and boot times for guest VMs are genuinely quick.
Networking
The dual Intel i226V NICs have been rock solid. I’ve split them across management and VM traffic which keeps things tidy, and 2.5GbE on both interfaces gives more than enough throughput for a homelab environment. I haven’t hit a scenario yet where network bandwidth has been the limiting factor for anything running on this host.
If you want to go further, the USB 4.0 ports theoretically open the door to additional high-speed networking via external adapters, though I haven’t explored that in this setup.
Power Consumption
This one surprised me in the best possible way. At idle the K8 Plus draws around 10-11watts, and under a typical mixed VM workload that climbs to roughly 80-85 watts. Compare that to even a modest rack server sitting in the corner pulling 80–100W at idle and the difference is significant — especially for a machine that runs 24/7.
For a homelab that stays on around the clock, that efficiency matters both for your electricity bill and for keeping the room it sits in at a reasonable temperature.
Running Horizon — A Taste of What’s Coming
I want to touch on Horizon here because it’s the reason I bought this machine, even if the full writeup is getting its own post.
The short version is — it works, and it works well enough to genuinely impress me for a single-node homelab setup. The 8845HS has enough compute to run a a Horizon environment and a small pool of instant clone desktops simultaneously without the host becoming a bottleneck. RAM is the real currency here, which is why I’d encourage anyone following this path to fit as much as their budget allows from the start.
The integrated Radeon 780M doesn’t hurt either, while iGPU passthrough to individual VMs has its limitations under ESXi (more on that in the follow-up), the host-level graphics capability means the management-side components run without complaint.
Horizon on a single mini PC is never going to replicate a production environment, and it’s not meant to. What it does do is give you a fully functional, hands-on lab for learning the platform, working towards certifications, or just scratching the itch of having end-to-end virtual desktop infrastructure running on your desk. On this hardware, that is absolutely achievable — and I’ll be covering exactly how to get there in the next post.
Overall — Does It Deliver?
For a homelab host, yes. Comfortably. The K8 Plus punches well above its weight, stays cool, stays quiet, and gives you a platform that can run a meaningful lab stack without compromise. The performance headroom is real, the stability has been excellent, and, perhaps most importantly for a machine that runs continuously, the power efficiency means it doesn’t feel extravagant to leave it on.
It’s become the machine I reach for first when I want to test something, which is probably the best endorsement I can give it.
Verdict
So, is the GMKtec K8 Plus a good homelab host? In my experience, yes, genuinely and without much hesitation. But like anything, it comes with caveats worth knowing about before you hand over your money.
What It Gets Right
For a homelab ESXi build specifically, the K8 Plus hits an unusually clean combination of the things that actually matter. The Intel i226V NICs mean you’re not fighting drivers on day one. The Zen 4 cores mean you’re not working around vSphere scheduling quirks. The triple M.2 configuration — once you reclaim that WiFi slot — gives you a proper dedicated boot drive and two clean NVMe datastores. And the RAM headroom up to 96GB means this machine has room to grow alongside your lab ambitions.
Add in the low power draw, the near-silent operation under typical lab load, and a price point that would have been laughable for this level of capability even a couple of years ago, and the value proposition is compelling. This is a machine that has genuinely replaced bulkier, noisier, and more power-hungry kit in my setup without compromise.
The Limitations — And What the Community Says
It’s not all perfect though, and it’s worth being upfront about where the rough edges are.
iGPU passthrough doesn’t work. If you were hoping to pass the Radeon 780M through to a VM, the community experience is pretty consistent on this — the amdgpu driver fails to load in the guest, and it’s not currently a solved problem. For most ESXi homelab use cases this won’t matter, but it’s worth knowing if GPU-accelerated workloads are on your roadmap.
TPM support is limited. The onboard TPM only supports the CRB protocol rather than FIFO, which is what ESXi expects for full TPM functionality. You’ll likely see a warning in the vSphere client about it. There’s a BIOS option to switch to a discrete TPM mode which clears the warning, but it doesn’t fully resolve the underlying limitation. It’s more of an irritant than a blocker for homelab use.
RAM stability at higher capacities. There are reports in the community of stability issues under ESXi when running 64GB in dual channel configurations, with some users only being able to achieve stable operation with a single 32GB stick. I haven’t personally reproduced this, but it’s something to be aware of if you’re planning to max out the RAM — it may be worth testing incrementally rather than fitting 2x48GB and assuming it’ll just work.
No out-of-band management. This is a fundamental limitation of consumer hardware, not just the K8 Plus specifically — but if you’re used to iDRAC or iLO on enterprise gear, the absence of any remote management capability beyond what ESXi itself provides will be noticeable. If the host locks up hard, you’re walking to wherever it lives to power cycle it. For a homelab that’s on your desk or on a shelf in the same room, this is usually a non-issue. If it’s tucked away somewhere less accessible, worth thinking about. Personally, I have circumvented this issue by attaching a JetKVM to it.
Warranty and support are not enterprise-grade. GMKtec is a Chinese manufacturer and their after-sales support reflects that. The official warranty is 12 months, but the community experience with actually exercising that warranty has been mixed — slow response times, the need to ship hardware back to Hong Kong at your own cost, and variable outcomes. There are positive experiences out there too, but this is clearly not a company with a mature support operation behind it. Buy it knowing that if something goes wrong, you’re largely on your own. For a homelab that’s not running anything business-critical, most people accept that trade-off at this price point — but go in with eyes open.
It’s a single node. This sounds obvious but it’s worth stating: everything you run lives or dies with this one machine. There’s no HA, no vSAN redundancy, no second host to vMotion to. Again, for a homelab this is a known and accepted limitation — but if you’re planning to use this as a Horizon test environment that you want available consistently, factor in the occasional planned downtime for updates and the lack of any hardware redundancy.
The Bottom Line
The GMKtec K8 Plus is the right machine for what it is — a compact, capable, power-efficient homelab host that makes ESXi genuinely accessible without the usual friction. Its limitations are real but largely predictable, and most of them are inherent to the category of hardware rather than specific failings of this machine.
If you’re building a homelab to learn, to test, to work towards certifications, or just to run a proper virtual environment at home without dedicating a rack to it — this is an excellent choice at the price. I’m happy with mine, and it’s earned a permanent place in the setup.
The Horizon walkthrough is coming next.